 A thousand and one times in any given week in any voiceover group online, you’ll see one type of question from newbies worldwide.
- What kind of mic do I need?
- How do I set up my studio?
- What kind of equipment should I have?
The equipment side of voiceover can seem really intimidating to the newbie, and it’s importance makes it an area you don’t want to make mistakes in.
Why?
Your sound, your voice, are your product. Going cheap here means that people who hire you are not getting the best available product, and they’re going to notice and remember it if it’s not up to snuff. That will lead to it being harder for you to both get and keep work. And the more you invest in the “wrong” way the more you’ll have to do to make up for it, and to get new work for yourself.
So how do you find the right equipment?
 Well, the first thing you want to do is get a sense of your budget. How much do you have available to spend? The second thing you want to consider is your timeline. How soon do you need to be ready to go? The shorter the timeline and the smaller the budget the more difficult it is to make things work, of course.
If you’re trying to get started in voiceover quickly and cheaply, you probably want to find another industry. It’s a great way to make a living, but a poor one to make a living quickly. A good analogy would be to think if yourself as a farmer for business, instead of a hunter.
Voiceover requires developing relationships and trust between you and your clients, and also that requires significant time and financial investment in order to make a good start that you are able to maintain. Newbies can run in the red for some time before they’re able to start showing a real profit. This is why it’s more like farming, because you are planting contacts and doing marketing slowly over time, nurturing your business, and then having many sources of income once they and the metaphor grows.
Consider your Space
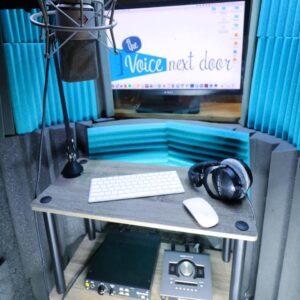
The next major question, before you spend a penny is to consider your space. This is the foundation of everything you’re building. The first thing you want to look at is the size of the space. The bigger it is the more challenging getting everything ready will be. Sound bounces, and a larger space will be far more difficult to avoid “bouncing” and sounding bad.
Many people start out their working life in a closet full of clothes or blankets hung to create a “dead” space. This isn’t ideal, and won’t do anything for outside noises, but is a workable place to start. Others have purchased PVC piping and moving blankets to make a small box to record in. As mentioned earlier, this will help you keep your voice sounding acceptable, but you will have to either time your recordings or purchase software to remove outside noises. (Lawn mowers, leaf blowers, trucks, cars, airplanes, air conditioners, and much, much more.)
No matter what space you choose, there are two more key things to consider. One, is what that space adjoins. If it’s a closet next to a busy traffic space in your home, you may want to look elsewhere for your space. That traffic will bleed through the wall. The second is ventilation. It’s unlikely that you would come to any harm, but you will be putting yourself in a small stuffy box for what can be hours at a time. It’s important to make sure that you have some way to cool off and get a breath of fresh air periodically.
Type of Equipment
Microphone
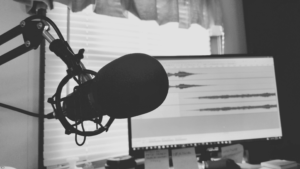
- The centerpiece. First of all, no matter what any budget voiceover guides tell you, a USB mic is not ideal. The sound is in general not good enough for voiceover work. With a mic, you also need a stand, shock mount (the thing that keeps vibrations from transferring to the mic) and pop filter to keep your spit out of it. A little googling will show you countless mic comparisons from the top end to the bare minimum. Different mics fit with different voices, genre of voiceover, and the way your space is set up.
- If you’re unable to get a good sound treated space put together, a shotgun mic may help you out. This type of mic is designed to only record whatever it’s pointed at (i.e. your mouth), and thus avoids some of the ambient noise that may be picked up in a mic with a larger pickup area. This article from Backstage has some good budget options that won’t break your bank when you’re getting started.
Cables
- Thankfully these are one of your simplest purchases. XLR cables will work–although be careful how you lay them out. Cables laying over one another can cause a buzz in your recording that is difficult to remove. Also, cables can eventually “go bad” and need to be replaced, so if you’ve got a clean layout and noise or problems still exist, you may want to consider swapping them out.
Interface
- This is another area where you can ask 100 talents what interfaces they use and get 100 opinions on what the right one is. There are a few more common interfaces that are popular like the Scarlet 2i2, but when you’re choosing this piece of equipment, in addition to the budget questions I mentioned above, you also want to consider your level of technology understanding.
- If you’re not all that familiar with audio equipment, don’t buy the fanciest thing on the market. If you don’t have tons of equipment that needs a million plugs, you don’t need something that has that. (And make sure whatever kind of connections it has are the same ones that are on your computer. This article by Gravy for the Brain highlights some of the most popular choices and includes audio files for comparison.
Computer
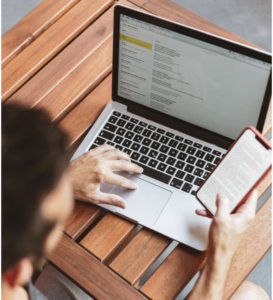
- No matter where you are or how you are recording, you will need some sort of computer to work with. The key elements that you want to look for here are noise–does this computer come with a big honking fan? Not a good idea to have in the booth with you, because your mic will pick it up.
- It is possible to use an iPad or other type of tablet in the booth to carry your script and keep your computer outside your recording area, but this is some additional work/cost to set up.
- The next consideration you need is a good amount of ram. You want at least 4 GB of ram, and preferably 8 to make sure that you can move around sizeable files and save them often. A better processor and a good sized storage drive are also good investments. Many talent choose to save their work, since if a client comes back to you needing a minor revision, you are then able to find references and add to them, rather than re-recording.
- Better yet, buy an EXTERNAL HARD DRIVE to store your recordings on so your computer processor doesn’t get slowed down.
 DAW
DAW
- This is short for Digital Audio Workstation, and it’s the name for the software you use to record into, and generally edit on. There are quite a few types of software available, and you will find people who are die hard fans of this or that kind.
- Audacity is one that many people start with since it is free and has some good basic tools. (Avoid garage band if you buy an Apple computer, it is not good software for voiceover though you can make any software work if you really want to)
- A simple and affordable option for Mac as an alternative to Garageband is TwistedWave.
- Other options out there include Quebase, Reaper, and ProTools
- There is a pretty hefty learning curve with most types of software, so watching some videos and spending some time learning the ins and outs of your DAW will help you have a quicker and more efficient workflow.
At the end of the day it all comes down to what suits your needs best. Thankfully there are lots of FREE RESOURCES out there that can help you make your selection process easier. Break a lip!